lördag 25 november 2017

julkort 2017


Hej 
Tänk att nu är det snart jul igen. Vart tog detta året vägen? Jag tycker att tiden bara rusar iväg desto äldre jag blir. 
Trots detta så har jag ju hunnit att få ihop några julkort i år också. 
Det är faktiskt så roligt att göra julkort och varje år säger jag att jag ska fortsätta att göra julkort då och då under året för att jag ska ha när det är dags så ingen stress uppstår, men ändå så sitter man där nästa år och har inte gjort det man tänkte sig, Men jag har inte så jätte många kvar så jag hinner i år också. Här kommer en del av de som är färdiga än så länge. 


Här är en del 


Vi syns. Ta det lugnt i adventsstöket. 
Kram 

Marianne


måndag 20 november 2017

boxcard


Hello 
 Today I will show you a box card I did 
with left over paper from The picnic in the garden kit.
There is soo lovely paper in this kit and it is soo easy to find paper who match each other.
I find this tutorial here and I hope you will try it your self. 


This is how it looks like when it´s closed. 


Almost open


Here it is open and you can se it´s like a box when you pull it 
out. You will pull it out a little more than I have done, it´s just because I have to hold the camera. 


I have put some tags inside the boxcard. 


This was all for med today. I hope you will have a wonderful time. 
Hope to see you soon. 


Hugs 


Pocket letter


Hi everyone.  
I will show you what I did with my
small piece i have left from  Picnic in the garden kit.
I have made a Pocket Letter .


It´s a new way to send letters to your penpals.
Basically, you fill all the pockets of  a 9 pocket trading card protector and send the whole page to someone who wants to swap with you.
This can be a one-time exchange or you
can keep exchanging Pocket Letters indefinitely.
You fill the  pockets with anything you like
(stickers, tea bags, a note, washi tape samples, pictures, etc.)
A short note or letter is included and tucked
into one of the pockets. Then the Pocket Letter is
folded up and sent in a standard 10 size envelope.
It's the perfect way to send and collect letters from other Pocket Letter Pals  around the world .


I took some embellishments from the kit  and painted it
with 13 arts acrylic paint orchid pink. Then I took some 3d foams and put it on the outside with hello in the middle.


Here is some close up pictures. 


In this pocket I put a privat letter to my friend. 


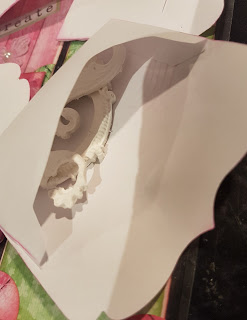
Here is the backside and you can put your things right in the pocket or do as me and make a small envelope. 


Here I have put some frames that I made from molds. 


This is the pocket you need if you want to do Pocket letter. 

Thats all for me today.


Hugs 


fredag 10 november 2017

Be happy


Hello everyone.
I´m working with The Picnink in the Garden  kit.
There is so much paper and stuff in this packet.
Today i have make this card and i agree with the word.
It´s soo true that life doesen´t need to be perfect to be wonderful.
I think the words say so much. 
Sometimes we just have to take a deep breathe and let time stand still and not be too perfect. 


The front. The paper are so beautiful I love to work with them.
They make the work so easy.


This is such a good message


Here is the inside. One more nice paper and words


I like the bird and flower on the paper so much. 


A close look at the butterfly


And here´s a close look at the  roses you get in the package.

That´s all for this time. I hope to see you soon. 
Take care. 

Hugs


söndag 5 november 2017

gift box


Hello everybody.

Hope everything it´s ok whit you all. 
Today i will show you a gift box I made with some papper I have left from the wonderful papper kit Picnic in The Garden
In this box  you can but some jewelry or some chocolate inside.
Or whatever suits. I found the tutorial here


When it´s closed


A bit open 


Here you see how the box look like when it´s open. 


Her I have but two bracelet in the pouch 


Closed again 


Some nice roses 

It was all this time. See you again soon. 
Hugs to you all. 


case to a notebook


Hi Marianne here.
Today I will show you a cover which I make for a few years ago. 
I hope you will enjoy this tutorial and that you understand my English. 

This is a case to a paperblock. 
It´s nice to have on the table and write down  things you may not forget for exampel. 

I have made them with the beautiful papper från Picknic in the garden. They are so good looking. 

This is how they look and how i did them. 


Here you have the measurement. 


The two and one pieces I cut out from a food package. Its a little bit harder an usual cardstock. 
Then I cut the cardstock at the measurement above. 
I glue the food package  down on the cardstock as you can see on the picture.


Then you cut every corner like the picture. 


Then you take your bonefolder and score in the gap and around like the picture above. 


Now it will look like this. 


Now its time to decorate with the lovely paper. Inside and outside. 


Here you see the pocketCut out the measure and score it and cut the corner like the picture. 


Glue the pocket on the right side and do a little pocket on the left side if you want. 


The pocket on the right side is for inserting the backside of the paperblock. 


Here is the final result. Here you see the paperpad I put inside. I don´t know the correct English word for it. 


II hope you enjoy my tutorial and try it yourself. 
Do not forget to go in and look at these wonderful  kit from 
The International Scrapbooking garden.
Hope I see you next time. 
Hugs
Marianne 

I hope you enjoy